Controller for hot air
popper.
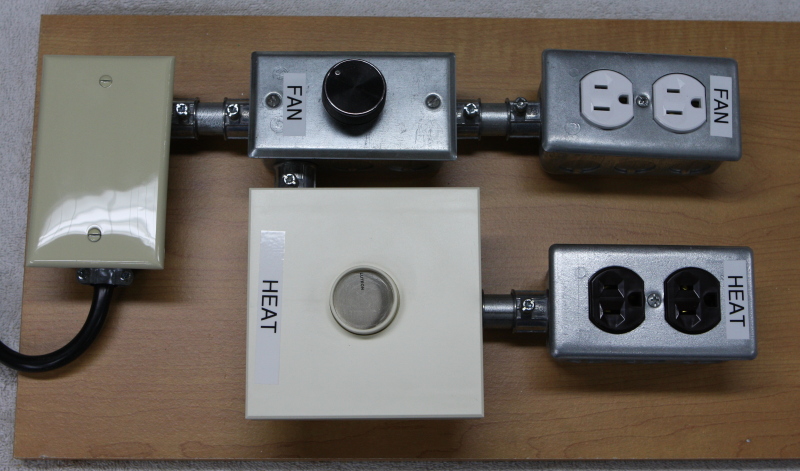
The controller for the hot air popper provides a motor speed control and
a temperature control. An extension cord cord is split to feed a motor
speed controller and a 1500 watt dimmer. The two outputs are fed to
outlets making it easy to connect the popcorn popper. A simple
schematic appears at the bottom of this page.
I cut some 2 inch pieces of conduit and used those to connect metal
boxes together. This was screwed down to a piece of shelving like so:

The motor speed controller is sitting on the lower right and the dimmer
switch on
the upper right. NOTE: You must use a 1500 watt dimmer. The smaller 300
to 500 watt
dimmers commonly found at hardware stores will not work. I suggest you
use a dimmer
with a rotary control rather than a slide control.
The next step was to string the white neutral wire through the conduit
and boxes as seen below.
I grounded the box on the left to the ground lead of the extension cord
feed and grounded the
outlets to their respective boxes on the right. I am counting on
electrical connections through
the conduit to provide a ground. This seems fine as the popcorn popper
cords are not grounded.
The truly cautious user would run a separate ground wire, use a ground
fault interrupter,
or not undertake such a project at all...

The next step was to run the black hot wire and install the motor speed
control and
the dimmer switch. I discovered at this point that the inner portion of
the dimmer switch was
large enough that it hit the end of the conduit connection in the
outlet box. This forced me to
drill alternate mounting holes in the aluminum cover plate of the
dimmer switch. I will see
if I can solve this for the next version.

The final step was to install the two outlets and connect the two hot
wires from the dimmer and motor
controller with the hot wire from the extension cord and connect the
two neutral wires with the
neutral wire from the extension cord. The ground wire from the cord was
connected to the outlet
box. Cover plates were installed and the finished board looked like
this:

Here is a rough schematic of the board:

A few final notes: If you run the heat without the fan running you will
burn out the heating element
in the popper. The slower you run the fan motor the hotter the heating
element will become for a
given temperature setting. I have not yet determined the lifetime of
one of these popcorn poppers.
I find that if the outside air temperature is quite cold it can be
handy to slow down the fan in order
to get the temperature as high as desired.
If this appears to be a complex project you should not try it. If
anything at all goes wrong
please don't hold me responsible. I am simply showing you what I did
and not suggesting
that you try such a project.
This link shows you a modified
popcorn popper.


